Connect NetSuite (your warehouse)
If your stock is in NetSuite, connecting it lets Nasam read your quantities from it and sync them to your channels.
The connection is a one-time setup that crosses between two systems: you generate the certificate with us, then set up NetSuite and come out of it with four values you enter with us to complete the connection.
Before you start
- A NetSuite account, and admin rights on it.
- The Location that holds your sellable stock in NetSuite.
Steps
Phase 1: Generate the certificate in Nasam
On the «Warehouses» page press «Connect a warehouse», pick NetSuite, then «Generate & download certificate». The nasam-netsuite.crt file downloads; you upload it in the next phase.
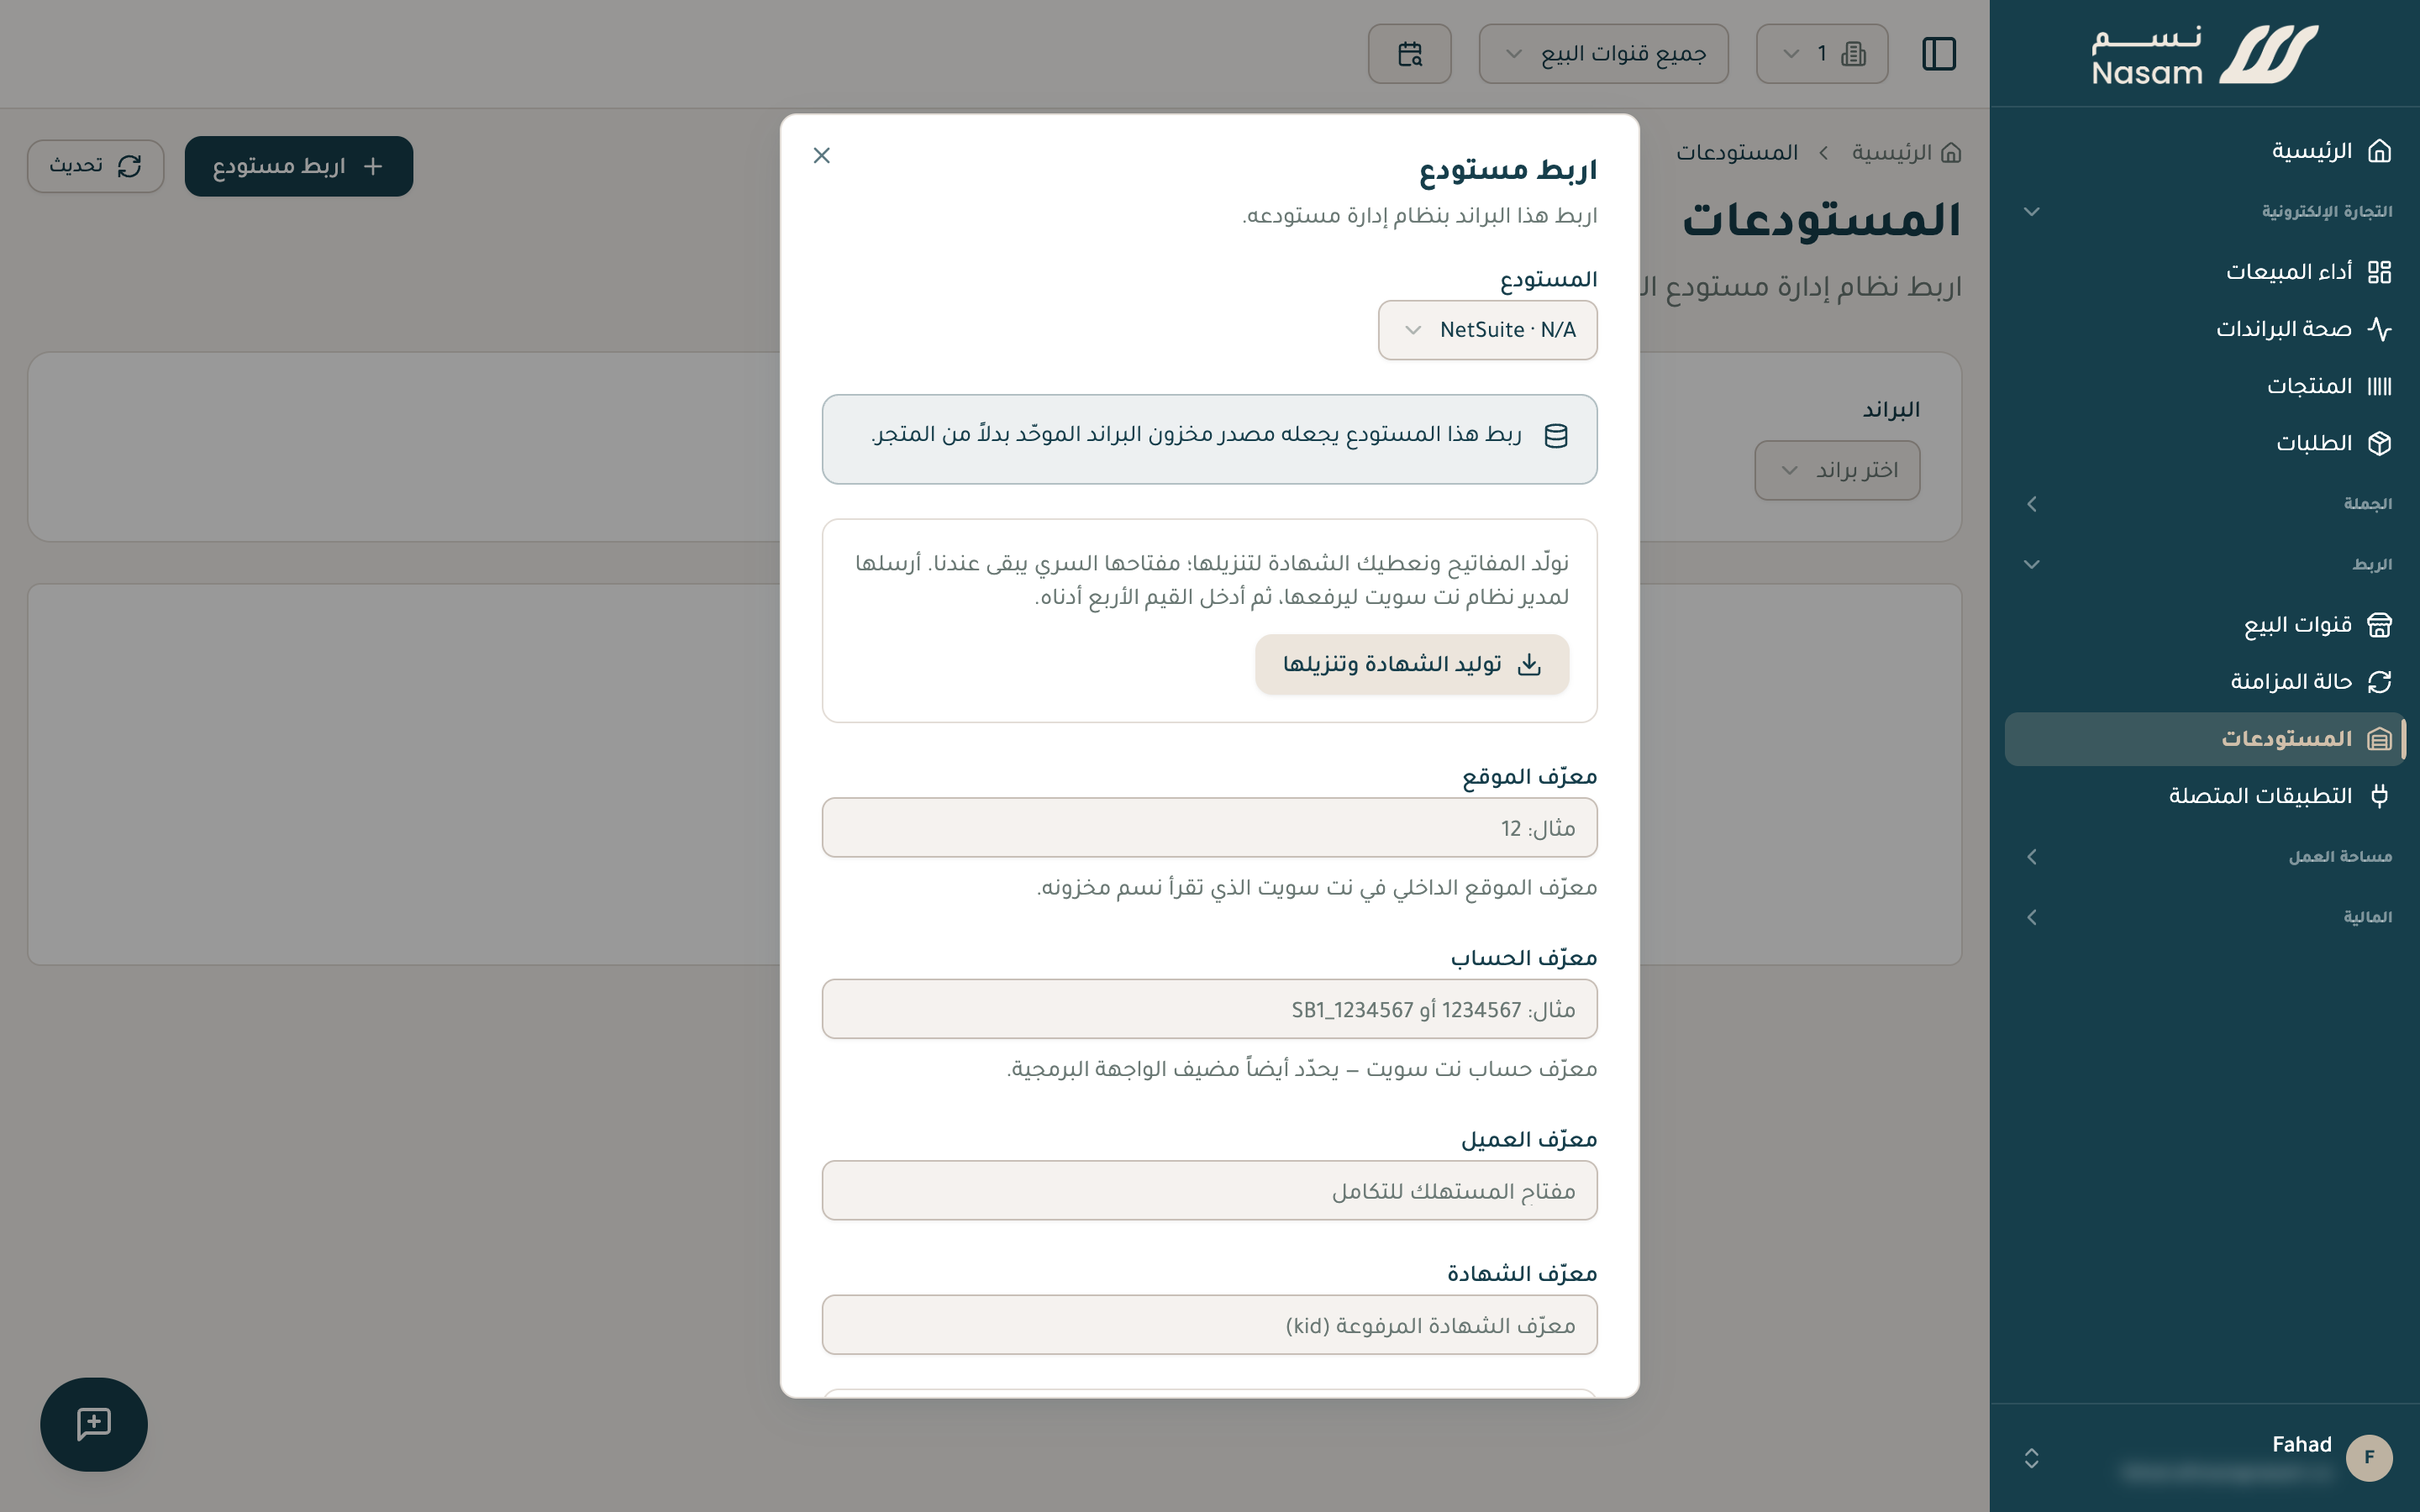
Phase 2: Set up NetSuite
These steps happen inside NetSuite and need admin rights on it, and you come out of them with four values. If someone else administers your account, give them the certificate file and these steps, and they hand the values back.
Open up access
-
Enable the required features. In
Setup › Company › Enable Features › SuiteCloud:Feature Where it lives REST Web Services SuiteTalk section OAuth 2.0 Manage Authentication section SuiteAnalytics Workbook Analytics subtab SuiteQL needs SuiteAnalytics Workbook to read stock.
-
Create a role with the permissions. In
Setup › Users/Roles › Manage Roles › New, a new role that is not Administrator:Permission Subtab Level REST Web Services Setup Full Log in using Access Tokens Setup Full SuiteAnalytics Workbook Reports Edit Find Transaction Transactions View Invoice Transactions Full Credit Memo Transactions Full Customer Lists Full Items, Inventory Lists View The Full levels are granted once so you do not have to come back to the role later: Nasam creates an invoice for every order it fulfils through your warehouse, a credit memo when one is cancelled or returned, and a customer when NetSuite has no matching one.
Wire the integration to the certificate
-
Create an integration record. In
Setup › Integration › Manage Integrations › New:Box What to do Client Credentials (Machine to Machine) Grant check it REST Web Services (under scopes) check it Authorization Code Grant leave it Then save. Authorization Code Grant is the box that asks for a Redirect URI, which this connection never uses. The Client ID shows only once on save, so copy it immediately. We need the Client ID only, not the Client Secret.
-
Link the certificate. In
Setup › Integration › Manage Authentication › OAuth 2.0 Client Credentials (M2M) Setup › Create New:Field What to pick Entity the user Role the role from step 2 Application the application from step 3 Certificate upload nasam-netsuite.crtThe Certificate ID appears (this is the
kid). This page needs the Administrator role or the OAuth 2.0 Authorized Applications Management permission.
Applications show up here once you save the step 3 integration record with Client Credentials (Machine to Machine) Grant on it. A record with only Authorization Code Grant does not appear in this list. If the page itself is missing, check that OAuth 2.0 is enabled back in step 1.
Get the two IDs
- Get the Account ID. In
Setup › Company › Company Information: copy the Account ID (e.g. 1234567, or 1234567_SB1 in a sandbox). - Get the Location ID. In
Lists › Accounting › Locations(enable Show Internal IDs fromHome › Set Preferences): copy the Location internal ID of the location that holds your sellable stock.
Phase 3: Enter the four values in Nasam
Go back to the same warehouse connect dialog, enter the four values, then press «Connect»:
| Field in Nasam | Value | Source |
|---|---|---|
| Account ID | Account ID | Step 5 |
| Location ID | Location internal ID | Step 6 |
| Client ID | Client ID | Step 3 |
| Certificate ID | Certificate ID | Step 4 |
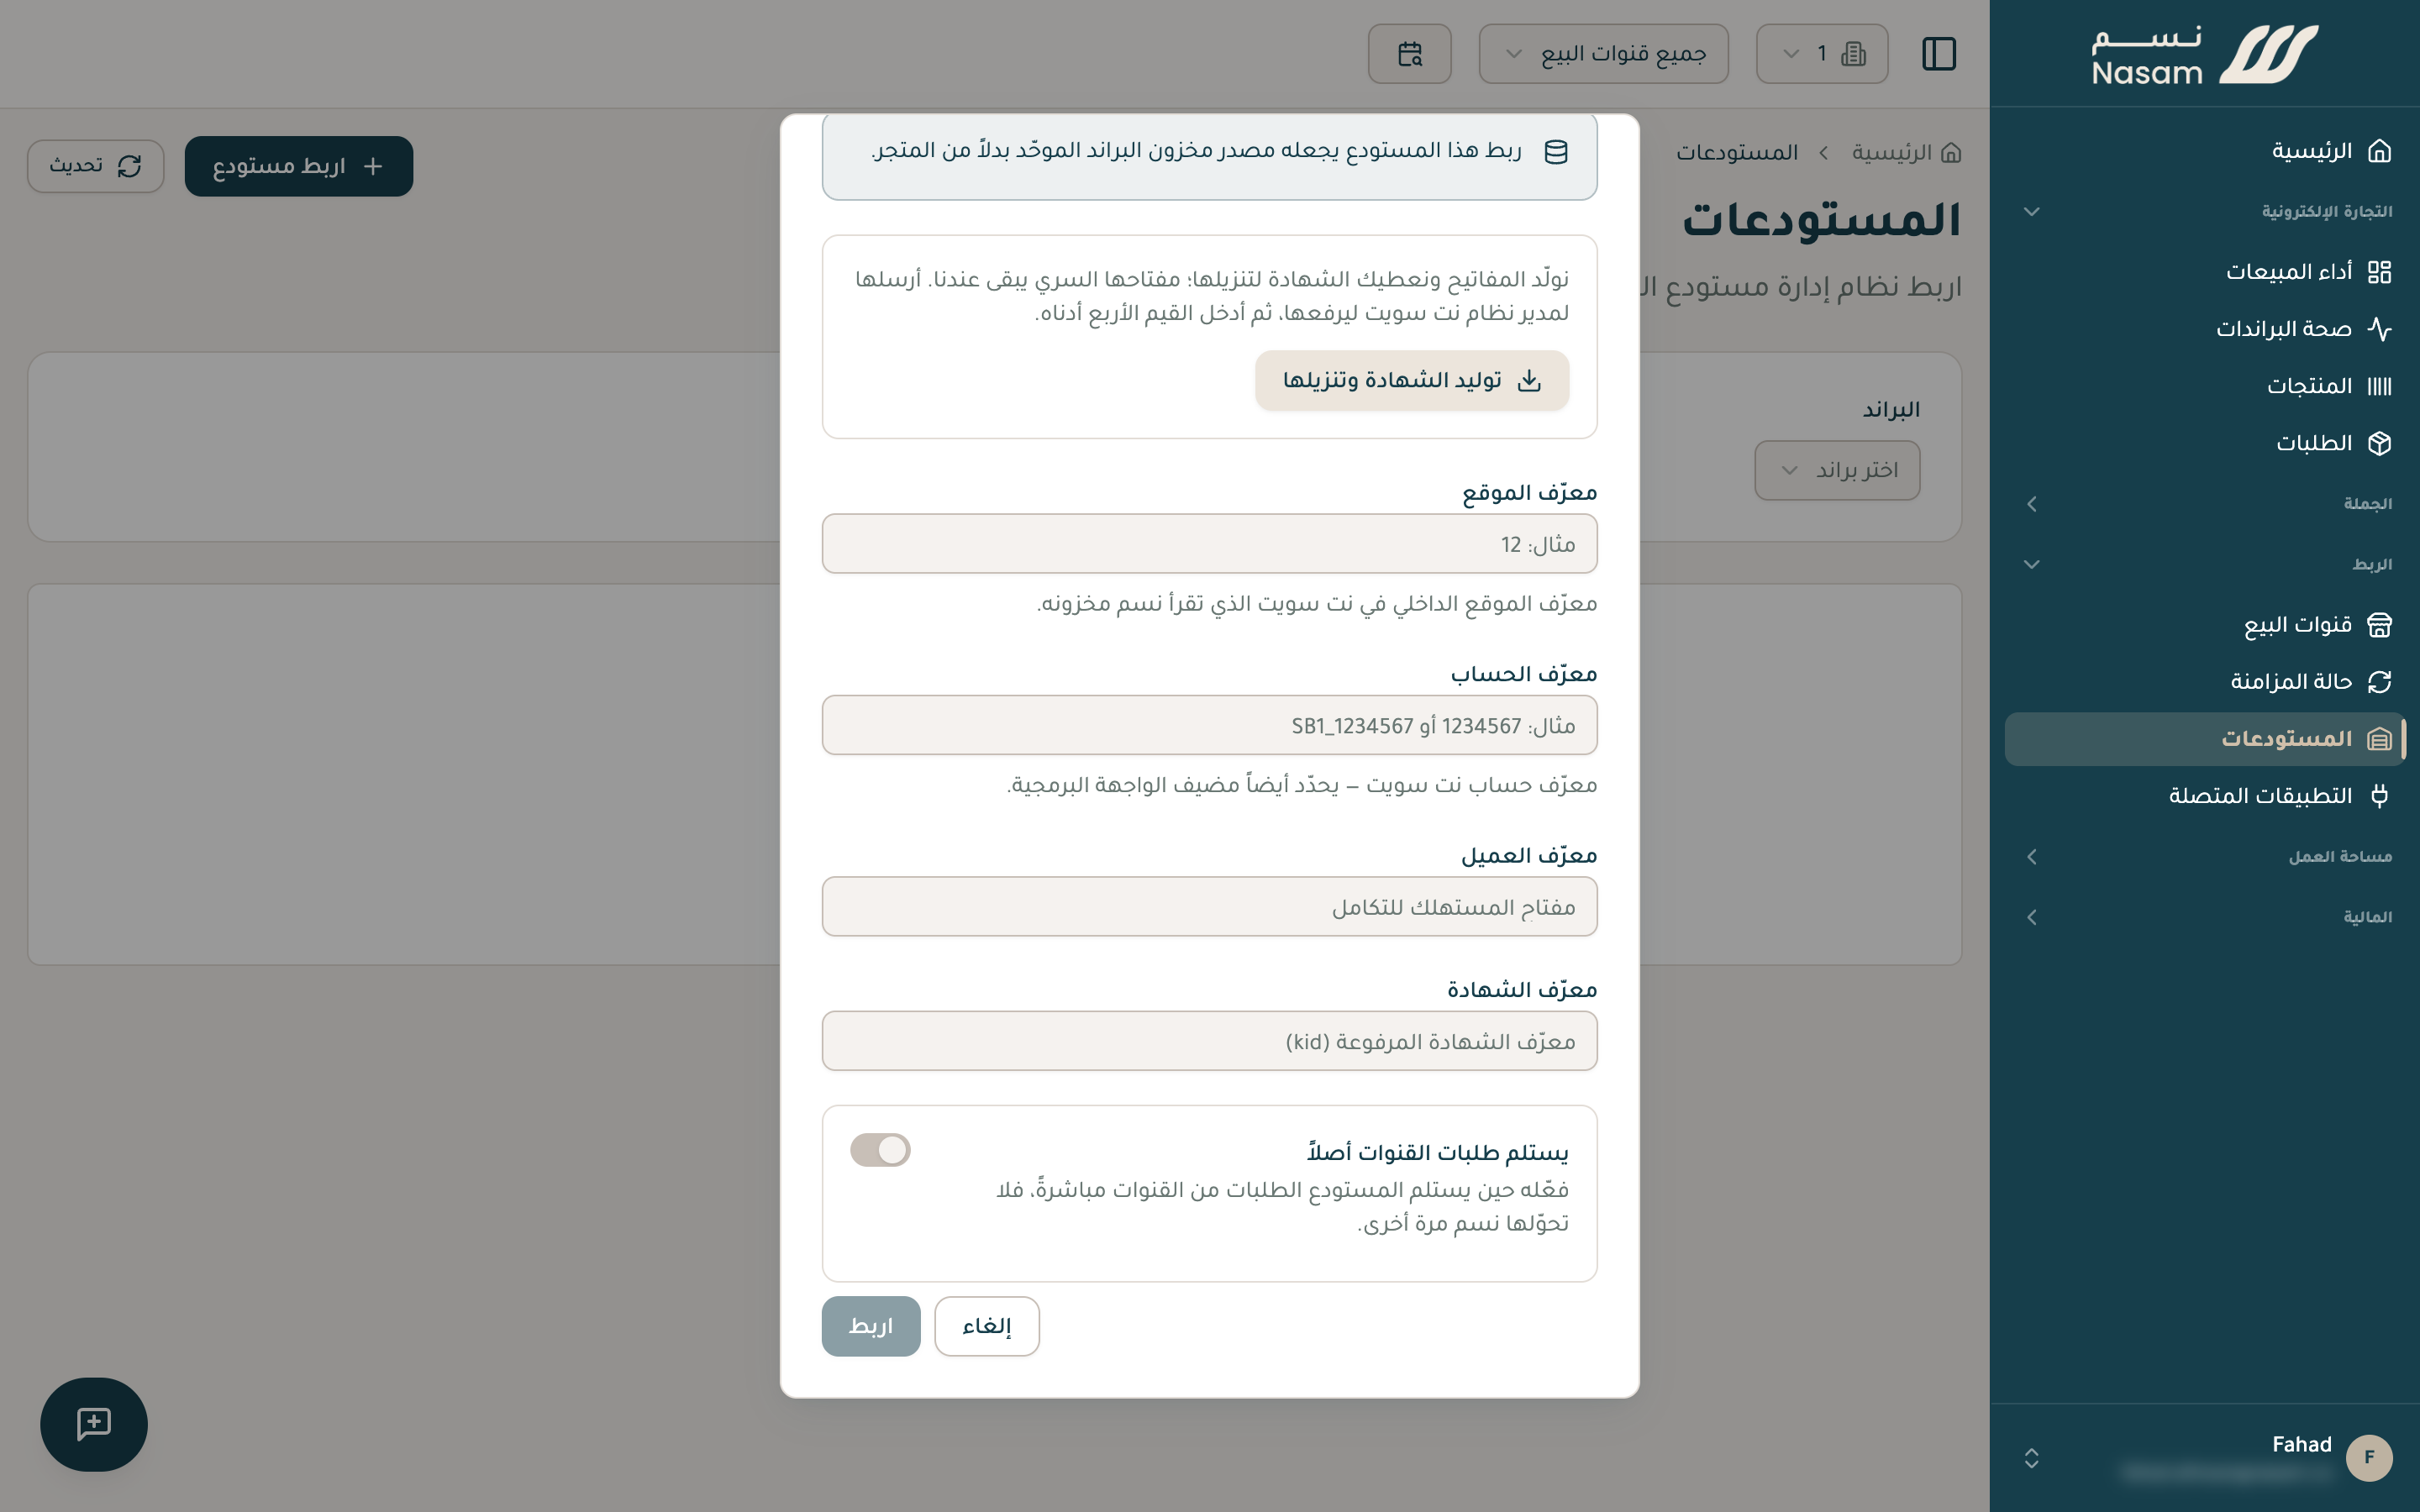
The NetSuite-side setup has its details; reach out and we walk it through with you step by step.
After connecting
The NetSuite warehouse becomes the brand's stock source: Nasam reads your sellable quantities from the location you chose, builds all your channels on them, and updates them within an hour of any change in your warehouse.
For orders Nasam fulfils through your warehouse, Nasam creates an Invoice in NetSuite, and the invoice itself posts the stock movement at the location you chose. If the order is cancelled or returned, Nasam raises a Credit Memo against it. Nasam does not create or read sales orders.
Your next step
- Inventory: when your stock changes and what syncs across your channels.
The Nasam team is with you, whatever the question: WhatsApp +966 55 009 0039 or general@nasam.co. And we set up your marketplace accounts with you, step by step. The consultation is free.